Thursday, December 25, 2014

Marvin's Castle"

This will be a carving to remember. I wasn't prepared for the frustration involved with a carving. To boot, I put myself under a "deadline" to finish this piece. The recipient will be retiring from Disney and I decided to give him a carving on his last day at work. Between trying to work burrs deep into the piece and trying to complete this piece on time I'm glad to have been able to actually complete this piece at all, let alone on time!

The idea of the Castle came from a fellow Cast Member at work, Kambria. She recalls Marvin's managerial connection to Disney World's Cinderella's Castle which is one of his proudest and most
enjoyable time of his Disney career.

The actual Castle is extremely detailed and delicate for my style of wood carving so Kambria suggested the more stylized rendition of Cinderella's Castle. The Castle's logo.

Simple.... so I thought!
 
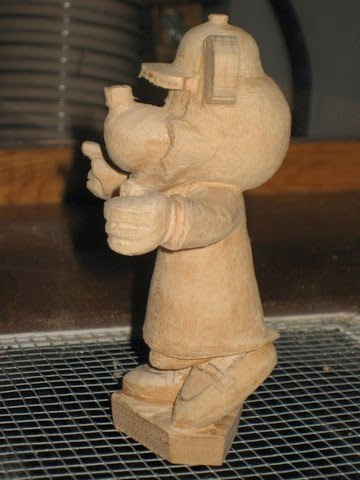
First the "roughing out" stage. As much of the bulk is removed with a band saw.
 The few towers in the Logo turned out to be a bit more challenging than at first thought. A number of them are set back which means planning the location for them in the bulk of the piece. At first I was going to carve a relief carving. That meant that I'd only have to "define" the towers rather than plan much differently for the depth of the carving. Well, the piece quickly morphed into a little more than I was expecting... a 3D castle was immerging!

 The back "wall" of the piece began to be reduced in size.
I know, I can save myself some time by making "trees" behind the castle.
 I attacked the "trees" and tried going " freehand sans any tree definition lines.....
Right, that worked! Off with the "trees!"
Now I have to fabricate the rear of the Castle. I struggled with all kinds of crazy ideas so I didn't have to get into too much detail. There are lots of windows on the rear of the actual castle so I thought it best to stay clear of that. As it turns out the day I was ready to seal and paint the piece it dawned on me that a simple second story patio with a curved enclosure would have much closer (and easier than I had first thought) to the real thing.
Oh well, its done!
 The frustration came from trying to "smooth" out the tower walls working with burrs that do not lend themselves to making flat surfaces on vertical recessed walls.

 
I refined the surfaces to a point, then just gave in and went for the "rustic" look!
I sacrificed detail and accuracy for "uniqueness."
After all, it will be a "One of A Kind Wood Carving!"


I added a staircase in the front of the Castle to draw your eyes to the front of the Castle.

Finally, its ready for paint and on time!
The finished product from a 4" X 4" X 12" block of tupelo wood.
The piece stands 6 3/4" tall from the surface of the mounting plaque to the tip of the highest flag pole.


Saturday, December 6, 2014

"The Man With No Name"

In June of this past summer I closed up my carving bench so we could relocate. I've been dwelling on carving this classic Clint Eastwood character for months. The hiatus gave me plenty of time to work this piece out in my head. I prepped by downloading a few photos from the (so called) Spaghetti Westerns of the '60's. I can remember watching "A Fistful of Dollars" with a friend and we couldn't stop talking about it... until the next one, "For a Few Dollars More" debuted. Of course, "The Good, The Bad and The Ugly" topped them all off. Eastwood's wardrobe remained the same for all three of those great westerns. With more than a little trepidation, here is my first attempt at woodcarving an actual person in the iconic pose that made Clint Eastwood famous.

The wood is tupelo and is 4"X 4" X 12". The finished carving including the base is 11 1/4" tall.

The image is sketched on the front only.  
 
 Once the piece is trimmed on the band saw, sketches on the side were made to show me just how deep I can cut from the front or back.
 
The more I can outline and trim into the piece, the better I can begin to visualize the piece.


So far, all of the above photos kept me on my toes not to cut too much away. But once the "roughing" is complete, patience becomes more important. Although, that's when you can truly notice that all your work is now beginning to look like the image you have in your mind!
 
 
I purposely left the hat brim thick to prevent me from breaking it. There's a great deal of handling as you continue to fine tune the piece.
 
Power carving makes for some rough surfaces that will need extra care.


The piece is "fine-tuned" and ready for sealing prior to the addition of any color.
 
The base is fitted to the piece.


The ever-present "stogy" in his mouth (actually a tricked out end of a toothpick) is attached.


The piece is sealed with Min-Wax Clear #209 wood stain.
The area under the feet is cut in a shape that I choose and the base is cut out with a router to fit the shape at the bottom of the piece. I prefer to inlay my carvings to the base for longevity. I typically add a screw from the bottom of the base into the piece for more support. The screw hole in the base is countersunk and plugged.
 
 
The paint is acrylic.
 
I hope you enjoy....
 
"The Man With No Name"


Wednesday, May 28, 2014

"Minnie the Disneyette"

Disney Tour Guides began building a Disney tradition six years after Disneyland opened. An article written by Lloyd Shearer in the Parade Magazine in a section of “The Advocate” newspaper in Baton rouge, LA of March 26, 1961 was short, but featured a nice picture of some of the 1961 Tour Guides and several quotes from so-called “Disneyettes” ( a term that has NEVER been heard since.)

//www.waltsapartment.com/disneyland-guides-they-have-a-dream-job/

 "Minnie the Disneyette" is actually going to be given to a Disney Tour Guide. This carving worked up easily however, I focused on details that would be more meaningful for the recipient. Here in Disneyworld the Tour Guide costume colors are reversed from the costume of Disneyland. I had some guidance from Kambria who just happens to be the recipients daughter.
I thought I'd make short work of this piece because I wanted to make it smaller than the usual caricatures I carve. I used a piece of basswood for this carving. I've been slowly switching to tupelo wood for my carvings but I had a nice clear piece of basswood that was itchin' to be carved.
I found out once my burr started removing wood why I started carving tupelo. Basswood "fuzzes" up rather than making a clean surface as the wood is trimmed away.
That just meant I had to pay more attention to finish sanding and proper sealing to complete the piece.
 
"Minnie" is five inches tall without the base and just under three inches wide.
 

 Her silhouette was trimmed out easily on the band saw.

Now to remove the bulk and begin shaping her features.


 After making a fair amount of dust, she's beginning to take shape.


She required a great deal of finishing with fine burrs. "Minnie" has a bow on her hat and a name tag on her vest. I was making great progress and overlooked carving them as part of the figure. I added them as separate details which I like much better. They actually "stand" off the figure to make them look even better than if I had carved them as part of the figure.
I added a piece of toothpick to the back of the bow and bore out a hole for it in her hat.
The name tag was easier than I thought except I had to fabricate a tiny "peg" on the backside of the tag to glue it to her vest. Below, her bow and name tag are next to her left foot.
I like to inlay the caricatures to their bases. 

Below she is sealed with MinWax 209 natural stain. Normally, the 209 is basically clear but it darkened the basswood quite a bit.
 
 After painting I realized  I didn't reduce her muzzle and jaw enough. It changes her image drastically. Unfortunately, it wasn't until after she was painted that I noticed her facial appearance. While photographing her I came very close to taking her back to the carving bench for a "face lift!" However, as so many of you know, these pieces can take a lot of hours to carve... sometimes you just go with the way the piece evolves.


After I give "Minnie" to her new owner, we may discuss a possible surgical procedure!