Saturday, June 22, 2013

"The Cheshire Cat"

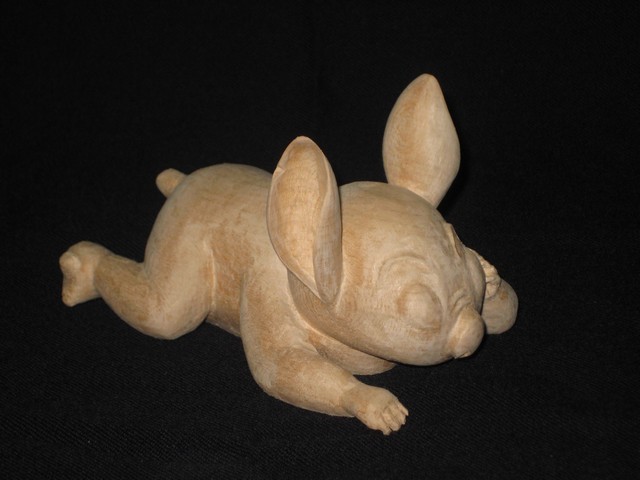
"The Cheshire Cat" was a fun carving! Given his rounded body with few details he worked up quickly. Hid head and face took most of the time. This carving is another learning/turning point in my carving. I've been sealing my carvings with a Michael's brand water based wood sealer. Recently, I began carving Tupelo wood, and I've notice much more grain swelling using this wood sealer. I've read many suggestions on the Woodcarving Illustrated Forum about sealing wood prior to adding the finish to a piece but just continued dealing with more texture in my finished carvings.... until "The Cheshire Cat!" (I'm also getting fussier about the final appearance of my carvings.)  I spent a good deal of time smoothing this carving only to notice much more roughness than I'd like in the finished piece. "The Cheshire Cat" made me rethink how I prepare my carvings for finishing. From now on its MinWax Polycrylic as a sealer!

The finish coat on "The Cheshire Cat" is Poly and that helped "hide" some of the unintended texture.
I hope you like "The Cheshire Cat."

"The Cheshire Cat" is another surprise gift to a friend and as always I start out with a photo (or two), a Tupelo wood blank, some pencil scratching and a brief stint on the band saw.


Then, it's time to get serious, a "Cheshire Cat" can be very impatient!


Don't let that smile get the better of you. He can be somewhat devious. 


The fun is over, (actually the real fun of a carving begins) its time to bring him "to life!"


Oh, and yes, his teeth glow in the dark
 

Thursday, June 13, 2013

"Dancin' Baloo"

Baloo just can't resist moving to good music! When selecting a photo to carve I try to "fit" the character to the carving recipient. In Baloo's case, the photo I picked is the one most seen with his friend "Mowgli" sitting Baloo's shoulder. When sketching Baloo onto the Tupelo wood I noticed that with "Mowgli" missing from his shoulder, Baloo appears to be in a dance move position. Hence, "Dancin' Baloo!"


Time to bring "Baloo" to life...
 
 
Remove some wood here and there...
 
 
OK, now don't remove too much!
 
 
Time to perform a little "surgery" to make some space between his left arm and body.
 
 
Don't fret, I just need a little space with the knife to open things up a little.
 
 
That does it!
 
Let's give him a base and some color....
 
 
OK Baloo, make some moves!


As Baloo says, "Beautiful! That's real Jungle Harmony!"


Sunday, May 26, 2013

The Black Stallion

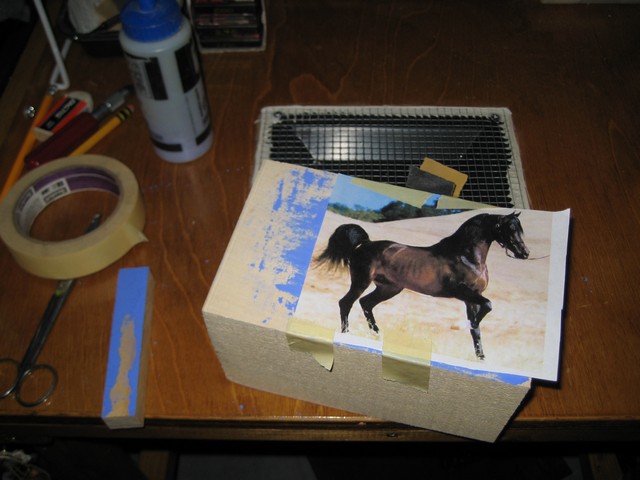
"The Black Stallion" is my first attempt at carving a (complete) horse. The photo I used had the horse standing in tall hay-like grass. As with all my carvings I start out with a photo and draw the image on one side and the front of the block of wood. This time I tried to make a template by chalking the side of the block of wood and  tracing with a stylus. Here's how "The Black" began...
 
Tracing worked but I didn't need all the chalk dust.
 
After cleaning all the chalk dust the piece is ready for trimming.
 
The side view was coped out first on the band saw.
 
Below, you see the left and right sides removed. (You'll also notice the blue chalk tinted the wood.)
 
Next we begin to remove the "bulk" of the wood from around the horse.
 
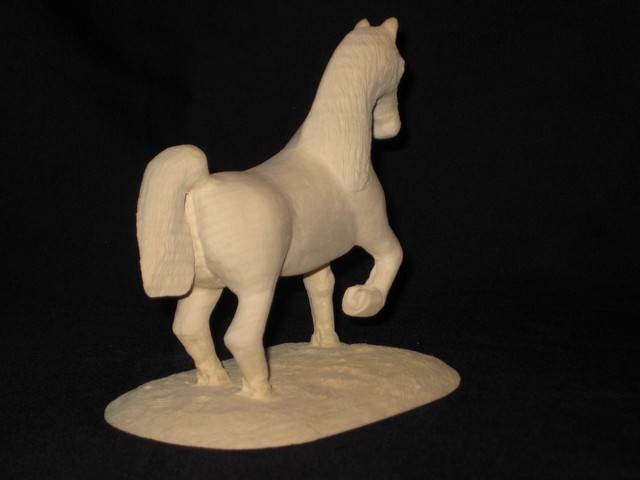
"The Black" is made of Tupelo wood and measures 4 1/2" from the base to the tip of his ears and 5" from the tip of his tail to his nose. His legs are much thinner than I'd care to carve them. I left them on the thicker side. You'll also notice that his hoofs are set into the "grass" so each leg he's standing on will "appear" sunken into the grass.
 
The fun part of each carving is when I can begin to "smooth" the piece out and add subtle details.


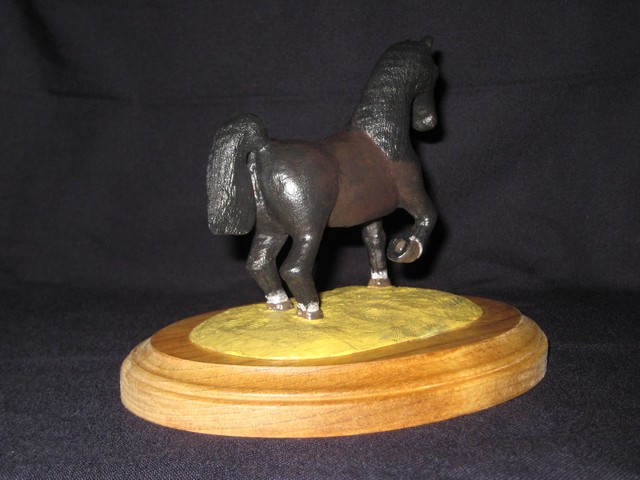
"The Black" is ready for paint and mounting.
 
Above, he's glued and clamped onto his base.
 
Below, "The Black" is given a protective coating of semi-gloss clear and all that's left is to give him to his new owner. (Who just so happens to be the person I gave "The Horse's ...." to!)


The horse is a noble animal. I hope this carving lives up to the Black Stallion's image and glorious history.
 
“The Black was looking out on the open sea; his ears pricked forward, his thin-skinned nostrils quivering, his black mane flowing like windswept flame. Alec could not turn his eyes away; he could not believe such a perfect creature existed.”
Walter Farley


Tuesday, May 14, 2013

"Studious Stitch"

Finally! I just finished my second "Stitch" for a friend. Actually, this guy is the "second" second stitch. You see I had to scrap the first piece because I cut too much wood too fast! Lesson learned!

"Studious Stitch" started out like all pieces, on the band saw. He's made of basswood, is 3" by 5" by 3" and is resting on a 5" by 7" base. I'm a "power carver" and use a Mastercarver flex-shaft tool for 99.9% of all my carvings. Once in a while I need to clean edges and use an Exacto knife.


"Stitch" will be on his stomach relaxing on the ground reading a book.
 
 
"Stitch's" big ears did me in on the first attempt. I made sure to leave plenty of wood this time around.
 
 
At last, I can refine his features.


Give him his book!
 
Add some color and put the pieces together....


It's always a great feeling when you finish a piece... especially after the second try!


Thursday, April 4, 2013

"The Horse's ...."

A funny thing happened at the office. When talking about a new carving project the idea to carve a horse came up. The friend I was talking with laughingly suggested a "Horse's _ _ _!" The idea stuck and here's the results of that conversation.
A slender piece of Basswood will do the trick.
With a minimal amount of band saw work the piece was ready for carving.
I planned to carve the tail as well.
At this point I just happened to be talking to my brother-in-law and sister-in-law, Bill and Angela about using either doll hair or something similar. They suggested why not use real horse hair!
That was perfect! They contacted their longtime friend, Rachel in North Carolina and a couple days later I received an envelope with a hunk of horse hair in it.
I'd like to thank Bill and Angela for the idea and Rachel for "sacrificing" her horse's tail.
 
Now, the carving took on a whole new meaning.
I removed the wooden tail, whipped the end of a gathering of horse hair and glued them together.
The results made all the difference.
 
 
The "Horse's ..." recipient is a horse lover and rider and she loved the results.
 
And that's the end of this tale!